Pardot Form Submission Conversion Tracking With Google Tag Manager & GA4
How to setup Pardot form submission conversion tracking with Google Tag Manager and Google Analytics (GA4).
Tracking form conversions is a fundamental aspect of any successful marketing strategy. When it comes to harnessing the power of Salesforce Marketing Cloud Account Engagement (Pardot), understanding where your prospects and sales are coming from will allow you to take your marketing strategy to the next level.
In this resource post, we’ll guide you through the steps for setting up form conversion tracking in Pardot, ensuring that you can measure the effectiveness of your lead-generation campaigns and make data-driven decisions to optimise your marketing.
Please Note:
- This guide will work for GA4 Google Analytics and Google Tag Manager. This guide assumes you already have these setup and running on your website.
- This guide is for the standard Pardot forms (not Form Handlers). The process would be slightly different form Form Handlers and we may cover this in a future guide if it’s requested.
Step 1 – Create your form in Pardot
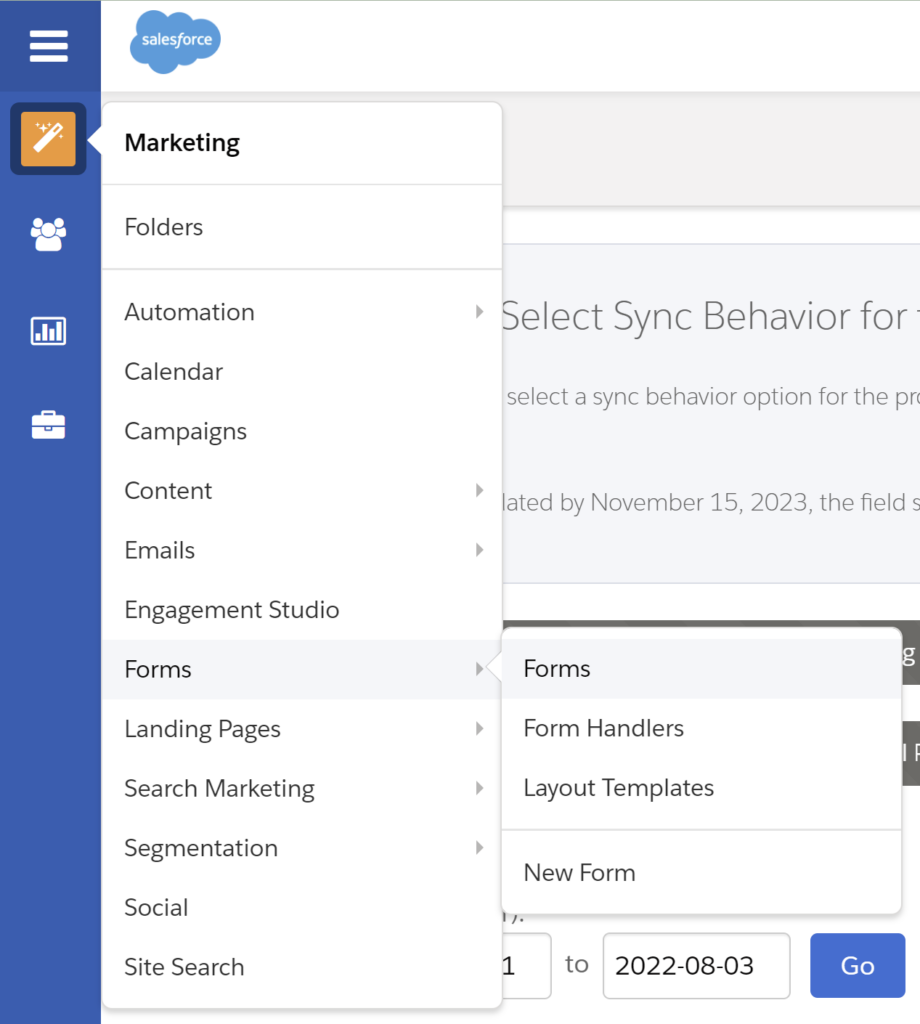
We won’t go into much detail on the form setup as this article is aimed at the conversion tracking setup. However, first step would be to create your Pardot form. To get started with this, first navigate to ‘Marketing‘, ‘Forms‘ and click ‘Forms‘ (see Screenshot 1.1). From here you will select your form template and start adding your form fields.
Step 2 – Add your Datalayer Push script to your Pardot Form Completion Action
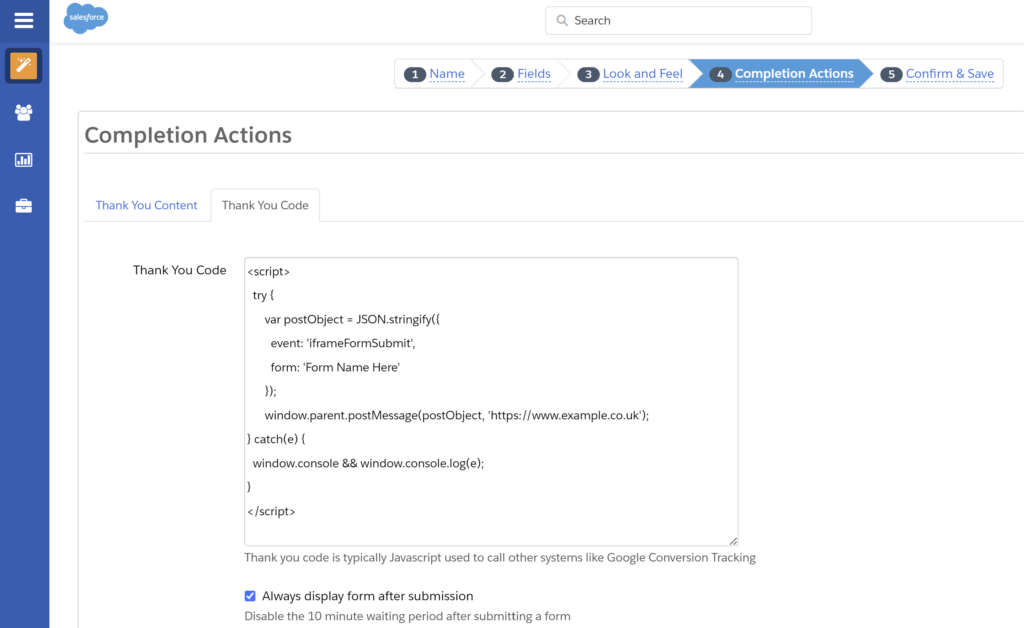
Once your form has been created, the next step would be to add your datalayer push script to the form completion action (see Screenshot 2.1). This will go in the ‘Thank You Code’ section of the Form Competition Action in Pardot. This will send a message into the datalayer upon successful form submission.
As the Pardot Forms are added into the website via an iframe, the datalayer script required is slightly different to a normal datalayer push. This modified script will essentially allow it to push from the child frame (embedded iframe) into the parent window (where the Google Tag Manager container is).
Example Script:
<script>
try {
var postObject = JSON.stringify({
event: 'iframeFormSubmit',
form: 'Form Name Here'
});
window.parent.postMessage(postObject, 'https://www.example.co.uk');
} catch(e) {
window.console && window.console.log(e);
}
</script>
Please complete the following before adding your script:
- Replace: https://www.example.co.uk with your own website domain where your iframe is being placed. This must be where your Google Tag Manager container is.
- Replace: ‘Form Name Here’ with a unique form name.
Step 3 – Create Listener Tag in Google Tag Manager
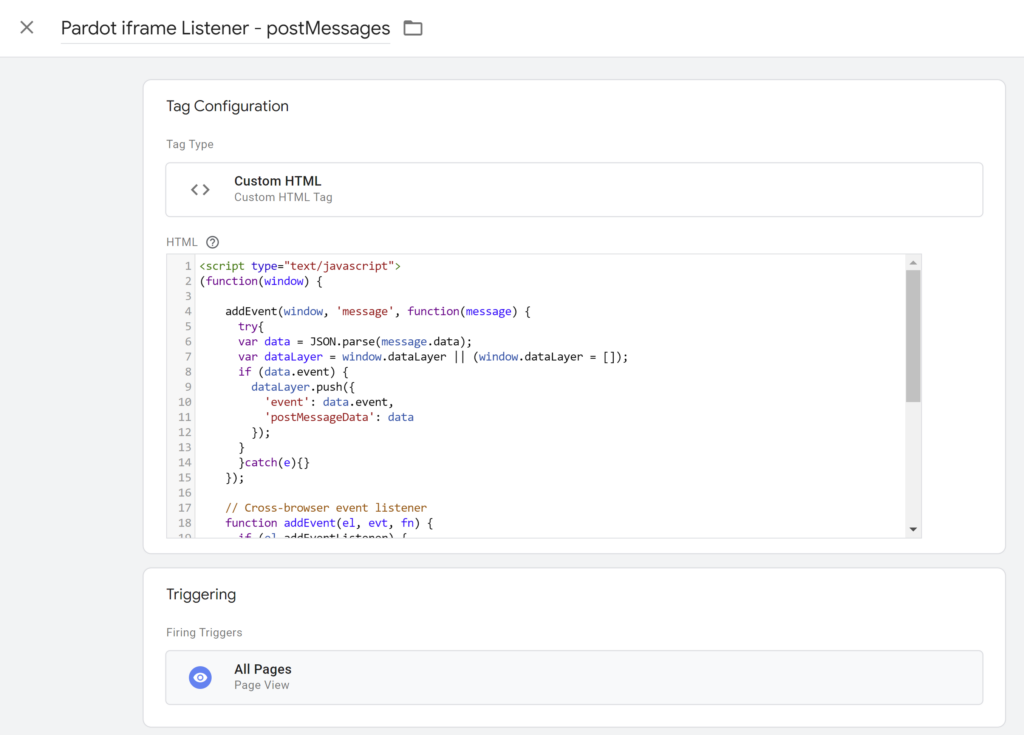
The next step is to create a listener tag in Google Tag Manager that will listen for the datalayer push event that we have added to the Completion Action in Step 2.
To create this go to Tags > New > Custom HTML. Add the script shown below and name your new tag. Configure your listener tag as shown in Screenshot 3.1 below.
This needs to be set to trigger on the pages where your forms are going to be located or alternatively, you can trigger it on all pages to cover all bases (as shown in Screenshot 3.1).
<script type="text/javascript">
(function(window) {

addEvent(window, 'message', function(message) {
try{
var data = JSON.parse(message.data);
var dataLayer = window.dataLayer || (window.dataLayer = []);
if (data.event) {
dataLayer.push({
'event': data.event,
'postMessageData': data
});
}
}catch(e){}
});

// Cross-browser event listener
function addEvent(el, evt, fn) {
if (el.addEventListener) {
el.addEventListener(evt, fn);
} else if (el.attachEvent) {
el.attachEvent('on' + evt, function(evt) {
fn.call(el, evt);
});
} else if (typeof el['on' + evt] === 'undefined' || el['on' + evt] === null) {
el['on' + evt] = function(evt) {
fn.call(el, evt);
};
}
}

})(window);
</script>
Step 4 – Create your form tag in Google Tag Manager
The next step is to set up your Tag and Trigger in Google Tag Manager.
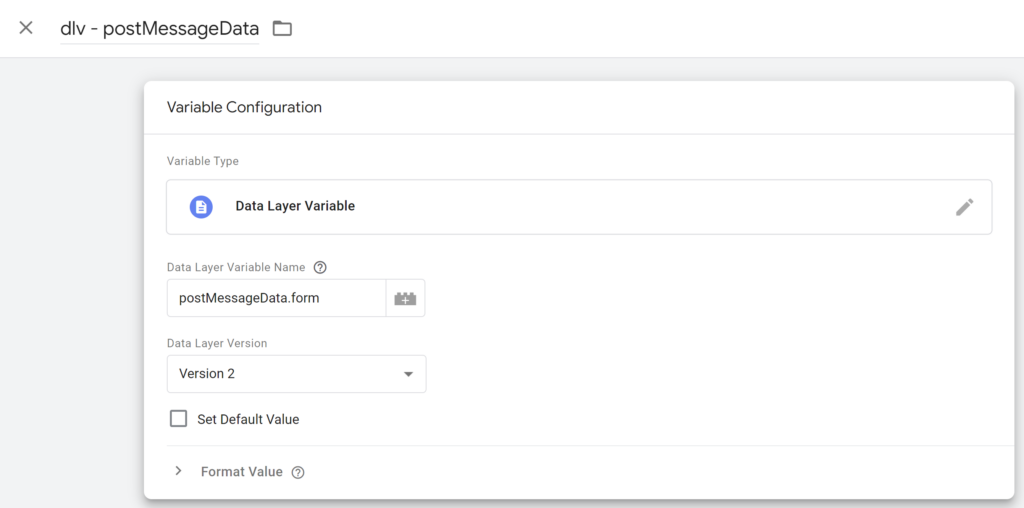
First, you need to create a custom variable that will recognise the message (form name) from the datalayer push. To do this go to Variables > User Defined Variables > New > Data Layer Variable. Configure your new custom variable as shown in the Screenshot 4.1.
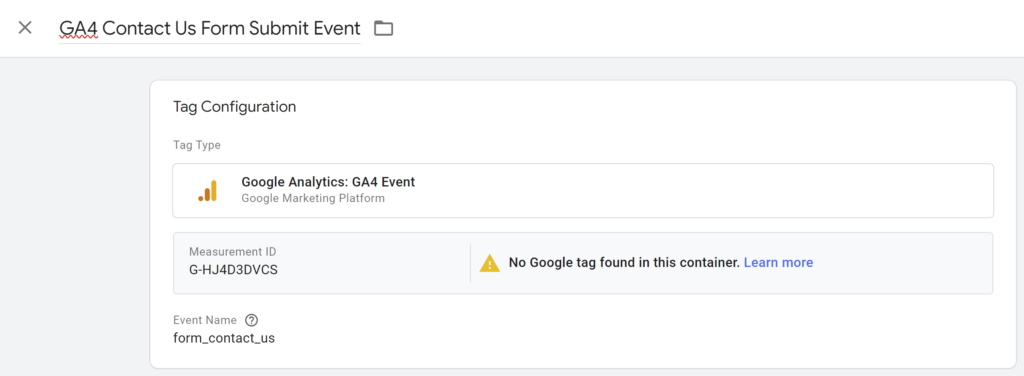
The next step is to set up your Tag. You will use one tag for each form/event you want to display in Google Analytics. To do this go to Tags > New > Google Analytics > GA4 Event. Configure your new GA4 event tag as shown in the Screenshot 4.2.
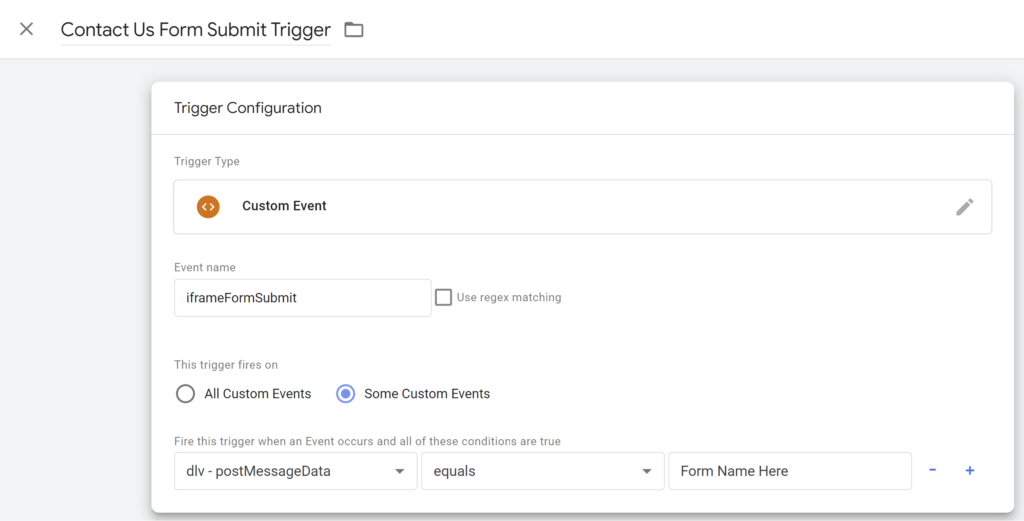
The final step of setting up your Tag is to add a trigger. The trigger will look for the custom event and form name we defined in the datalayer push script in Step 2. First, go to Triggers > New > Custom Event.
Configure your custom event Trigger as show in screenshot 4.3 below.
Once your trigger is created the last step is to attach this to your new Tag.
Before publishing your new Variable, Tag and Trigger, make sure to test it in Google Tag Manager preview mode by submitting a form. You should see your new Tag fire on the form submission. Once you have confirmed it is working correctly, make sure to publish your new changes.
Step 5 – Enable the new event as a Conversion in GA4
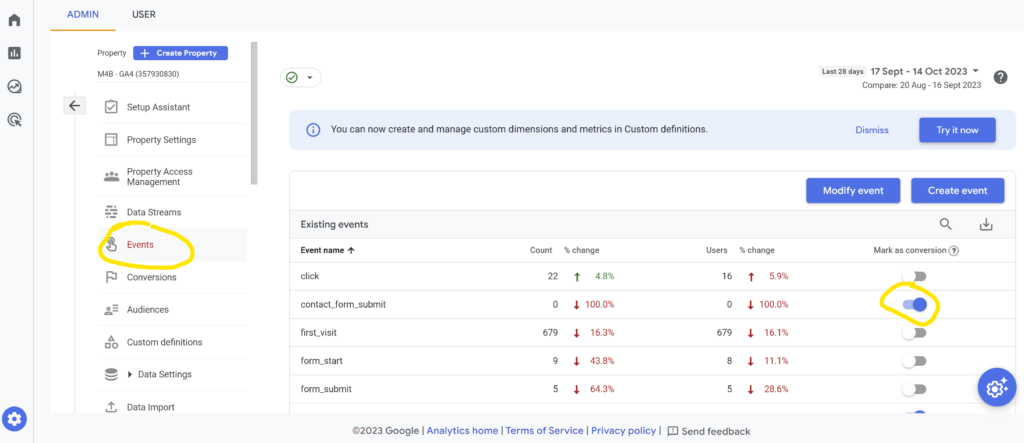
The final step is to enable the event as a conversion in GA4 (see Screenshot 5.1). This will then show the form submission as a conversion in your reports.
Please note: It may take 24 hours before your new events show in Google Analytics.
Need help with your conversion tracking?
Our consultants have years of experience with Pardot and Google Tag Manager. If you need any support setting up conversion tracking in Pardot, please get in touch. M4B can also provide Pardot Training tailored to your business and marketing needs.
Like it? Share it

